Shortly after my husband and I began dating, he told me that he had someone that he wanted me to meet. He felt that she might be a great friend for me and that we would get along well. That was about 18 years ago, and to this day she is one of the truest friends that I could imagine. She is like a sister to me and I cannot imagine the past 18 years without her.
When we moved across the country, she is the only thing that I miss from “back home.” I will never stop keeping my fingers crossed that she will decide to move to a nicer climate although I understand all of the factors tying her there.
In all of our years of friendship, Rachel has been there for me through every imaginable trial. She has kept me strong and I have never felt that I could repay her for all of it. But I have tried in the one way that I know best … through her stomach.
This woman loves delicious food, and I think my cooking skills are one of the things that she loves most about me. But as much as she enjoys good food, she cannot cook very well. I have tried over the years to give her pointers, but especially now that I cannot drag her into my kitchen and teach her in person, I wanted a way to help her (and others with her lack of skills) and to share great, easy recipes with her.
Today, when I mentioned that I was starting this blog in her honor, she asked if it was going to be a blog with “Help for the Kitchen-impared.” We know each other so well.
I also want to create a family cookbook. My kids are getting older now and I acknowledge that in no time they will be moving out. I pray that they will always live close but I do not know what their future holds. And so, this site is also for them, so that they will always be able to find classic recipes from their youth, and will be able to remember the past through their tastebuds.
So welcome to this journey. I hope that you will enjoy these recipes as well and I look forward to hearing feedback on them. Thanks and be well. 🙂
Ok. I know it has been FOREVER since I posted anything new and I am super sorry for that! A few weeks before my last post I got a new job that was supposed to be just a part time thing, but it quickly grew into a full time, all-consuming entity that left me little personal time. But last week life got turned on its head again and I find myself with plenty of time for the things I love, which are cooking, sewing, and sharing both with the world.
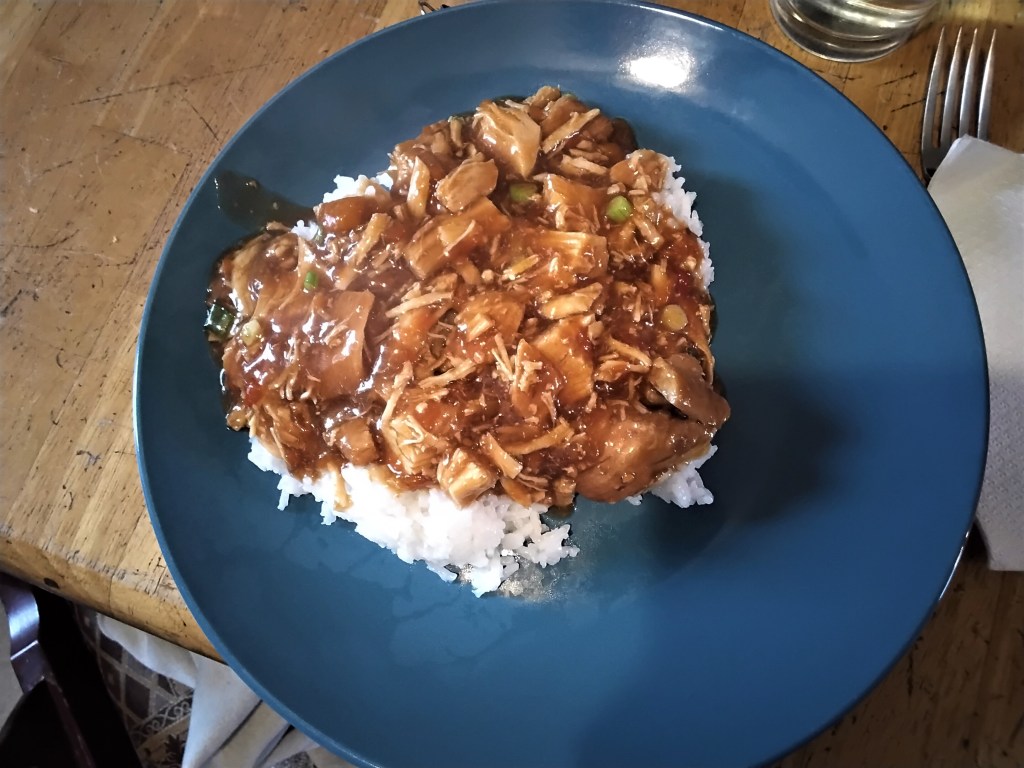
Bourbon Chicken Served Up
So, YAY! I get to cook and experiment again AND I get to share those beloved recipes, tips, and more with all of you as well.
I am working on a post for tonight’s dinner, which was Crock-Pot (slow cooker) Bourbon Chicken that will knock your socks off. Thank you for your patience with the long hiatus and any delays as I get back into the rhythm of posting regularly again. I am hoping for 2-3 posts per week but life happens and I simply cannot make any guarantees at this point.
But again, I do appreciate your patience and I look forward to resuming this journey with you! Stay tuned and get your taste buds ready for some fun times!
So you have your gluten-free sandwich wraps and your fresh tzatziki sauce, what are you ever going to do with them? If you are like me, you are going to make chicken gyros!
I am fascinated by the fact that every culinary culture in the world has some sort of a flatbread / wrap sandwich, and gyros are Greece’s addition to the list. They are full of freshness and are incredibly healthy.
Traditionally they are made with lamb, but many Americans lean towards chicken gyros, and as I am more likely to have chicken around than lamb, that is what I make. But feel free to replace the chicken with roast lamb if you have some laying around. You will not regret it.
Notes:
Gyros is a wonderful meal for a large group or family because everyone can just build their own according to their personal tastes. Just slap bowls full of toppings on the table and let everyone experiment.
It is a dangerous world in my house right now, and I am not talking about Covid-19. My kitchen has become a war zone and I am on the attack against boredom at the dinner table. We have been in a rut recently, only making the same family favorites on an almost predictable rotation. And I have been unhappy. My tastebuds longed for variety, my senses for a new world to explore, but I didn’t know where I wanted to start.
I have always been open to trying new foods. My mother was always excited that she could take me anywhere and I would be able to get by, while my brother would only survive if there was a fast food burger place nearby. I know that there are certain foods that I have absolutely no interest in even trying, such as escargot, frogs, octopus, or crab. I also know that if someone asks if I like Brussels Sprouts, I will not say no, because I have yet to try them and I may find that I love them.
My husband and I love watching shows together in the evenings and recently we have hit upon a few different series on Netflix that have caught our attention. We have very different tastes in shows, but we can always agree on cooking shows. That being said, a few weeks ago we watched a series titled “Restaurants on the Edge” which is about restaurants around the world that need a bit of a make-over to bring life back to them. It was amazing to see the different places and watch the professional chef help them work local culture and cuisine into their menus.
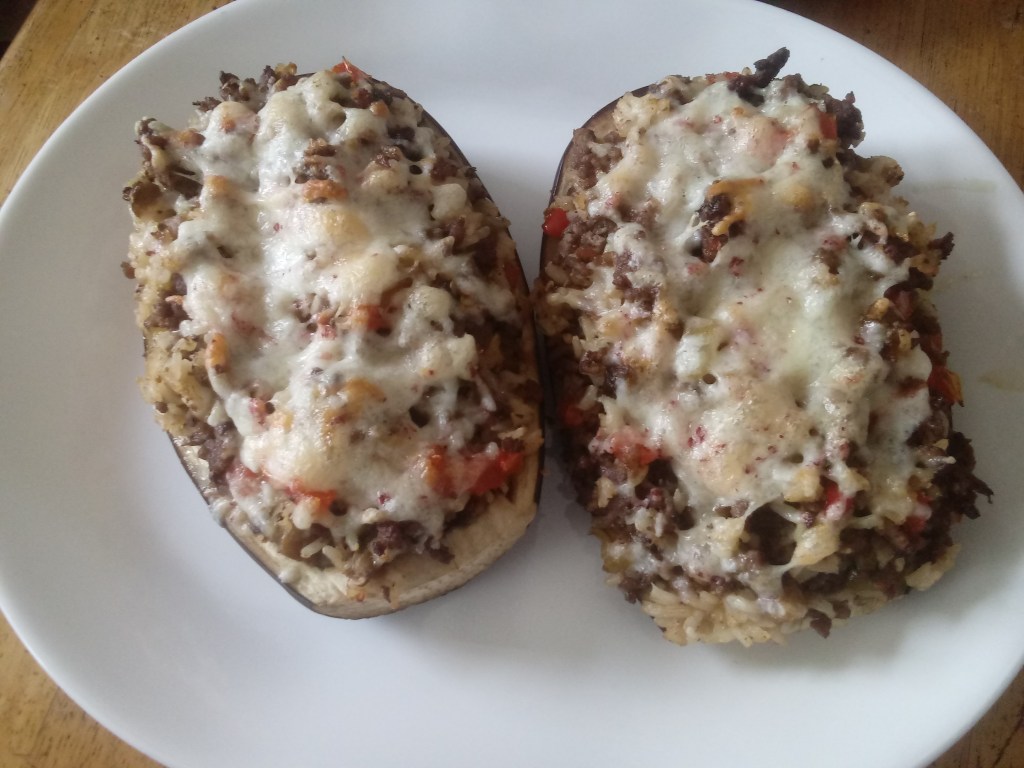
Beef and Rice Stuffed Eggplant
Then we found “The Chef’s Line.” This is what I now consider the ultimate cooking competition show. The premise of this Australian-based series is that they start the week with 4 home cooks who are proficient in a certain cuisine. They then face off against representative cooks from a restaurant which is known for that cuisine, starting with the apprentice chef and working up to the head chef on the final night. It really gave me some ideas for foods to try in cuisines I have never experienced, and sparked a craving for eggplant.
The past two nights we watched the 4 episodes of “Salt Fat Acid Heat” which teaches about the purpose and uses of each of those four components in cooking. I learned some really interesting information that I am excited to work into my daily culinary undertakings, as well as some recipes to try.
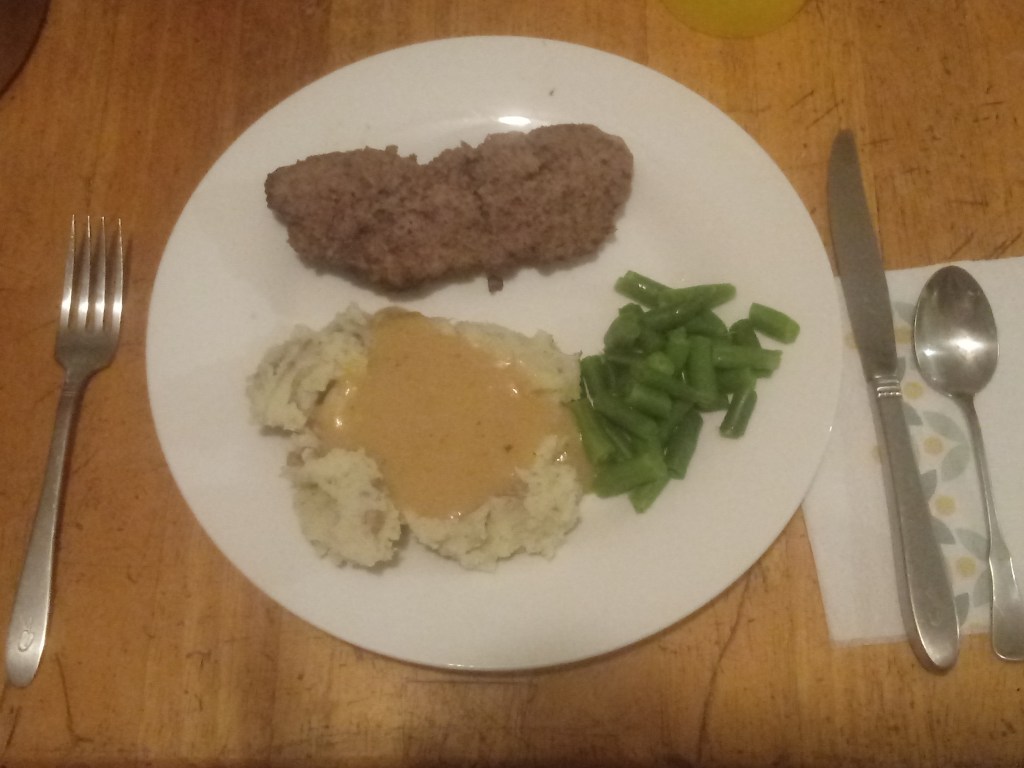
Sauerbraten with Mashed Potatoes and Green Beans
So yeah, with all of these influences, I have been trying all sorts of things on my poor family. LOL. Actually, my kids and husband are quite good about at least trying new things and giving me feedback. (Parents of small children, here is a quick tip, if you expose your children to lots of different foods from an early age and expect them to at least try things, they will not be as finicky as they grow up.) Meanwhile, my kids have even been stepping into the kitchen to learn fun new things and help out with meals even more than ever, since the menu is not the same old stuff we had fallen into the rut of making recently.
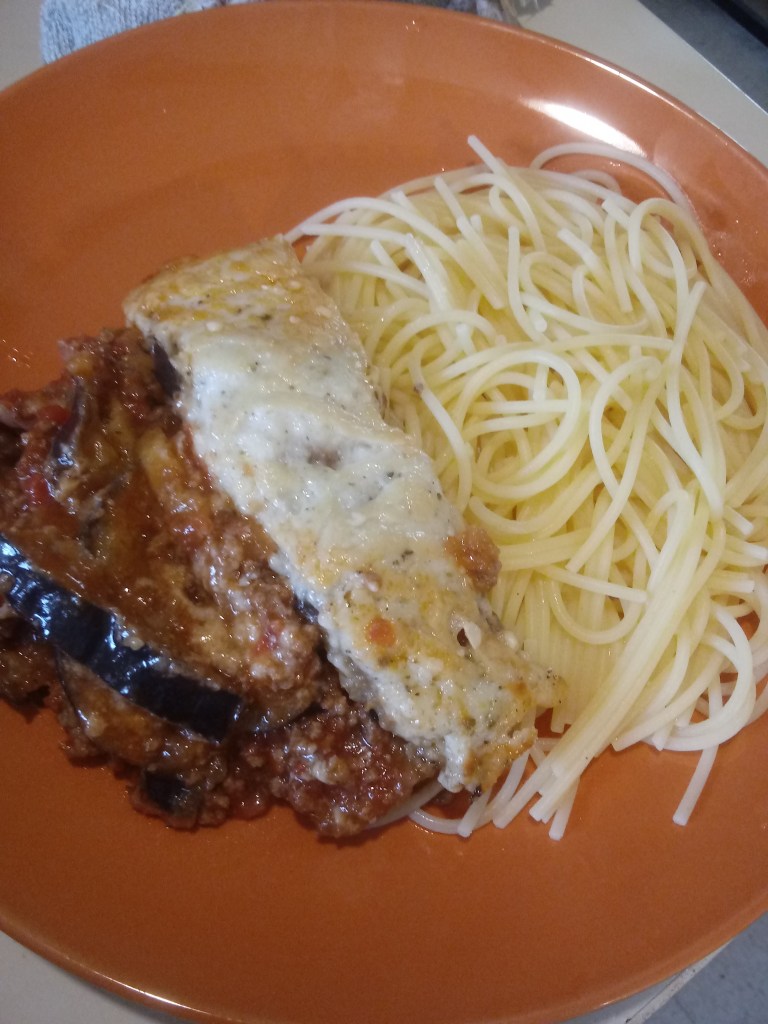
Today I made Moussaka. It is very likely that you are not aware of Moussaka even if you remember the scene from Disney’s Hercules where Hades references this lovely dish. And as fancy as it seems, it was pretty easy. It is layers of fried eggplant (I breaded mine though most recipes don’t do that), Parmesan cheese (Spoil yourself and get a block of cheese and shred it), meat sauce (I made a huge pot of sauce that I used for this and for spaghetti sauce for the kids who try a lot of things but don’t care for eggplant and are kinda sick of it), and topped with a bechemel sauce (which sounds intimidating but is just a basic butter, milk, and flour sauce). All in all moussaka is like a lasagna with eggplant instead of noodles and it turned out heavenly. I had no idea what to expect but I gave it a go and was not disappointed.
Moussaka with Spaghetti Noodles
Basically, what I am saying is that it will not hurt you to try new things. If you are unsure, look at a bunch of recipes, find one with lots of positive reviews, and give it a go. You may find new dishes or even entire cuisines that you fall in love with. Or, you may find that you truly don’t like something. Either way, you have expanded your horizons and learned more about yourself. After all, if you are not willing to test your limits and try new things, then life will remain in that rut and you will miss out on some amazing dishes. (But if you put your foot down about Greek Twice-Cooked Octopus, I will be right there with you. No thanks! LOL).
If you avoid trying to cook new foods because you are overwhelmed and intimidated, just know that cooking is not as hard as people make it out to be. There are plenty of websites, books, and YouTube channels that exist to share cooking styles, tips, and techniques. If you have specific questions, feel free to ask here and I will do my best to help you learn what it is you desire to know about cooking. That is, after all, why I am here.
And I will continue to share my exploits with you, so you can see the good and the bad and hopefully find some recipes that will help you on this journey.
So your first question is either “What is Tzatziki Sauce?” Or else it is, “How do I pronounce that word?” The easiest way to answer the second question is to tell you to treat the first T as silent and say “Zat-Zee-Key.” It is close enough that you will sound very knowledgeable if people hear you say it.
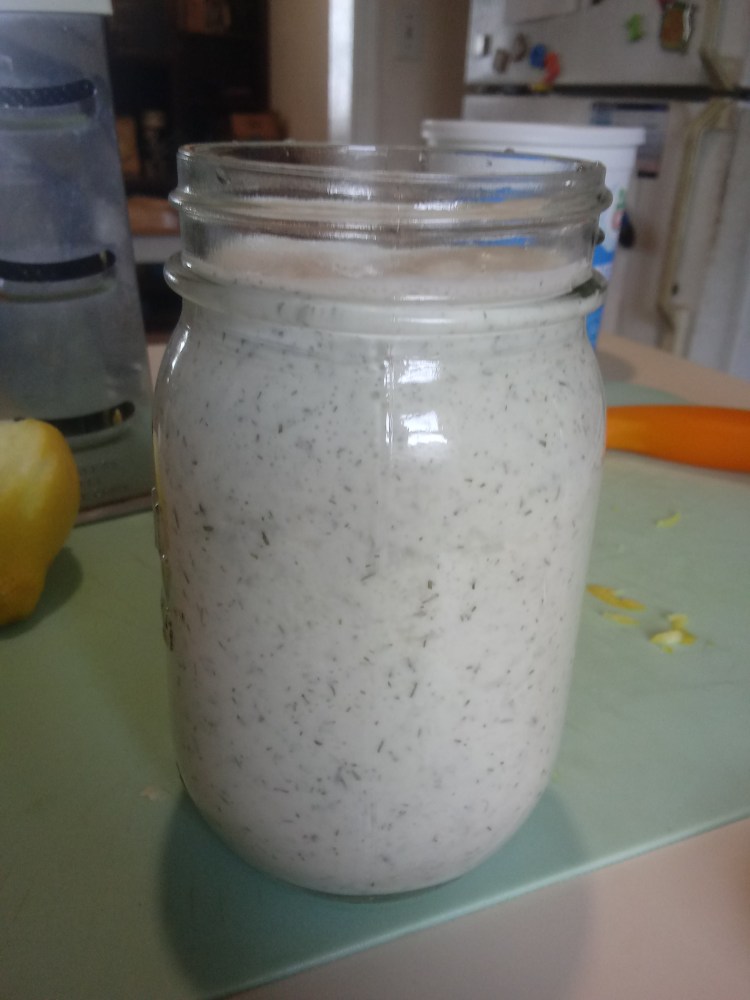
The answer to the first question is that tzatziki sauce is a cucumber and Greek yogurt sauce that is used on gyros, but is great on other things too!! This is a great dip for fresh veggies or pita chips. It is wonderful as a salad dressing. It is sublime as a dressing on sandwiches.
It is easy to make and has an incredibly fresh and vibrant flavor that you will want to try everywhere, so go for it! And please, let me know what you try it on because I am always looking for new flavor combinations.
Notes:
This is a thin sauce. I have found that using a low fat yogurt makes it incredibly watery. Sometimes it is worth the calories to use a higher fat product in cooking, and this is one of those times. Please use a full fat Greek Yogurt, or, if you need slightly less fat, use a 2% fat Greek Yogurt. Anything less than that will make it virtually unusable.
Also, Greek yogurt is not the same in consistency or flavor as plain traditional yogurt, so please get actual Greek yogurt. It is now readily available in most grocery store chains, so you should be able to find it.
This recipe is best made with all fresh ingredients. That being said, I cannot keep dill plants alive, so I use dried dill for this and it works. The lemon zest is optional but makes a huge difference, so you might as well get a lemon for the zest and the juice. It will only take 1/2 the lemon and there are many uses for the second half including juice for your tea or water, or even tossing into your garbage disposal to clean and freshen it. Otherwise, use bottled lemon juice. It works, the flavor is just much more muted.
Fresh garlic can be potent. I have overdone the garlic in tzatziki sauce in the past and it nearly burned our mouths. Your best bet is to use 1 clove of garlic, make the batch up, then taste it. If it needs a bit more oomph, then add another clove before you remove the sauce from your blender. Better to have too little and be able to add more than to add too much from the start and create an unusable product.
If you can make this at least 1 hour in advance, the flavors will blend nicely as they sit together, but you can use it immediately if that is what you need / want to do. I store my tzatziki in a mason jar in my fridge and I would say that it will last for about a week to 10 days. It may last longer than that but we usually use it all within a week, so I have no idea. Because of the dairy and the potential for it separating and getting nasty, I do not suggest that you freeze it for any length of time.
Ingredients:
1 cucumber
1-2 cloves Garlic, roughly chopped
2 tsp Dill Weed
1 tsp Lemon zest (optional)
1 Tbsp Lemon juice
1 1/2 c Plain Greek yogurt
Directions:
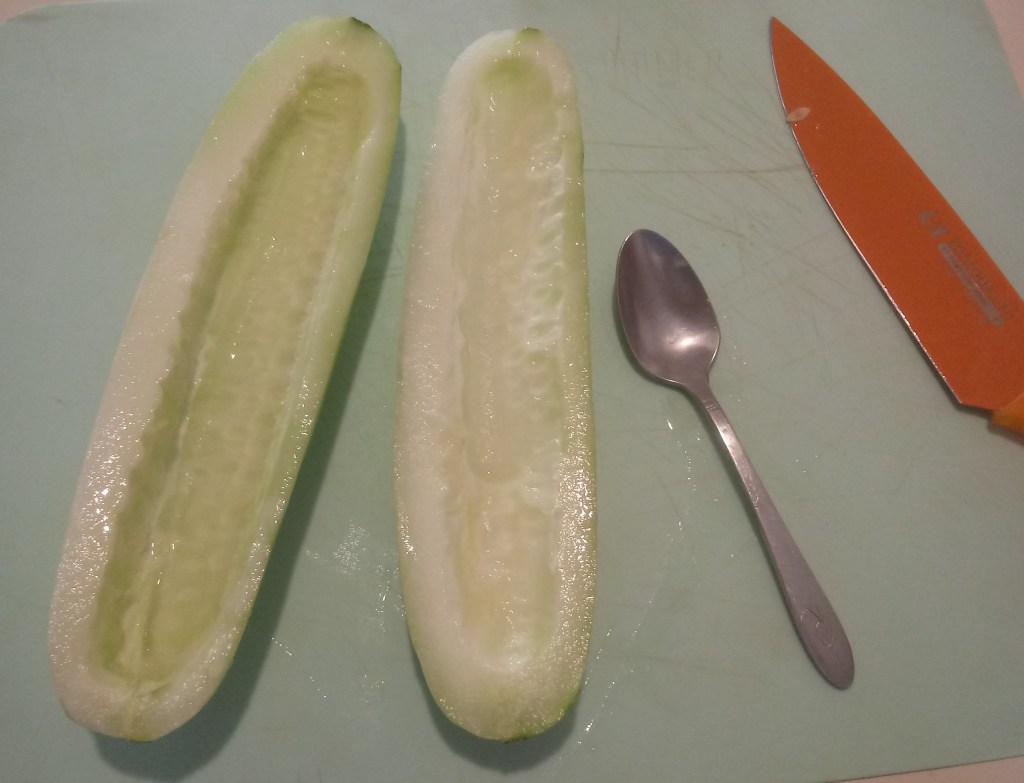
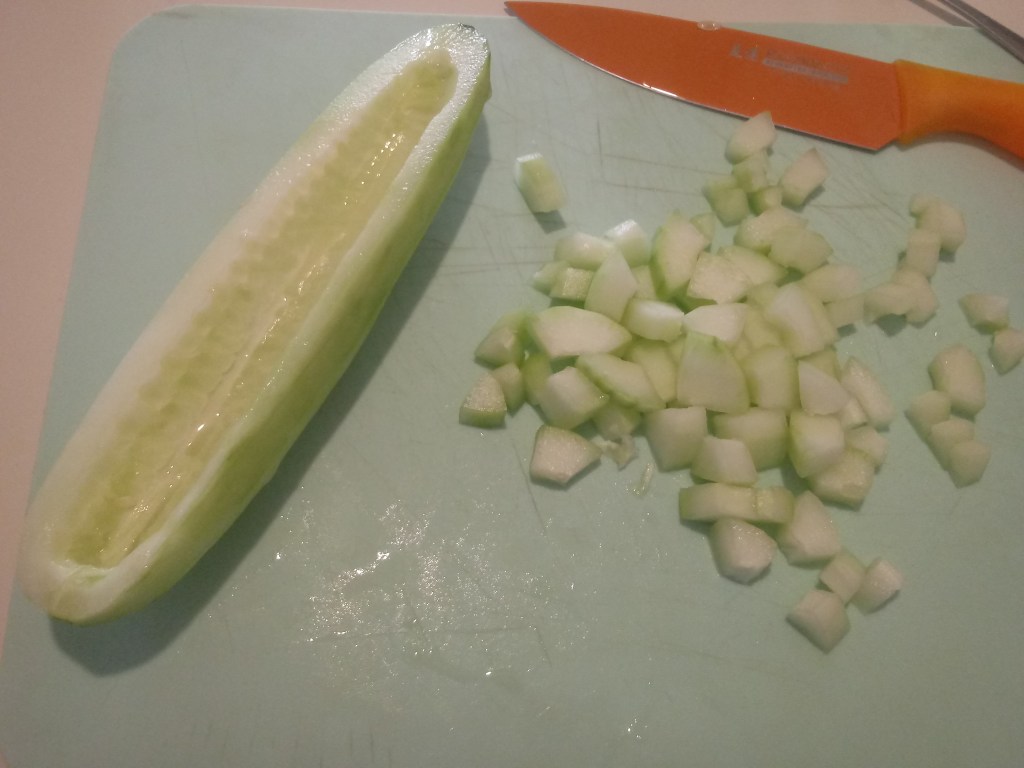
Peel the cucumber. Slice it lengthwise down the center, then use a spoon to remove the seeds. Roughly chop it into cubes. Place into blender.
Peeled, seeded, and ready to chop up.
Roughly chopped cucumber.
Add all other ingredients to the blender. Use pulse option to begin the blending process, until the sauce begins to form, then blend normally until the sauce is pretty smooth and of an even consistency.
Our family loves gyros. The thing is that there are absolutely no Greek restaurants in our area. Add to that the fact that my husband must eat gluten-free and it makes it tougher to enjoy this meal. I have tried many gluten-free flatbread recipes but they are either not flexible, full of complex ingredients, or contain leavening agents which, during the Passover season, we do not have in our house at all.
Today I found a different recipe that I have never come across before. It is an actually leaven-free recipe and only take a few ingredients. I have not explored this site very much yet, but I think I will likely be spending some time there in the near future. In the meantime, you can find the gluten-free naan bread recipe that I used as a starting point for my recipe, and can explore on your own as well.
The recipe was pretty straight-forward, but I still tweaked it a bit based on what I have on hand and what I was looking for in wraps for our gyros today. I will likely adapt this recipe into other flavor profiles depending on our needs, but I know this will be a staple in our house for the foreseeable future.
Notes:
I use King Arthur brand “Gluten Free Measure for Measure flour.” It is an easy flour to use as a replacement for regular wheat flour and I can find it in my local Publix stores. The quality is high and it saves me from having to mix up a bunch of different flours to create my own blend. I am all about easy when I can find it.
If you use a different flour blend, whether pre-made or your own mix, then you may need to tweak the proportions to get this recipe to work well for you. I found the original recipe resulted in a much thicker batter than I wanted, and that was probably due tho the difference between the flour blend she uses and the one that I use. You may find similar issues, so just adjust things as you need.
Chia seeds are super important and useful in gluten-free cooking. They help to bind things together in the absence of the gluten protein from standard wheat flour. To avoid having huge black clumps in the batter, it is better to grind them up. If you have a coffee grinder that you use for seasonings, that is perfect. Otherwise, you can use a mortar and pestle to grind them up. Don’t have a spare grinder or a mortar and pestle? Then put the seeds in a ziploc baggies, press all the air out, and run a rolling pin, meat hammer, or even a regular hammer over the seeds until they are crushed.
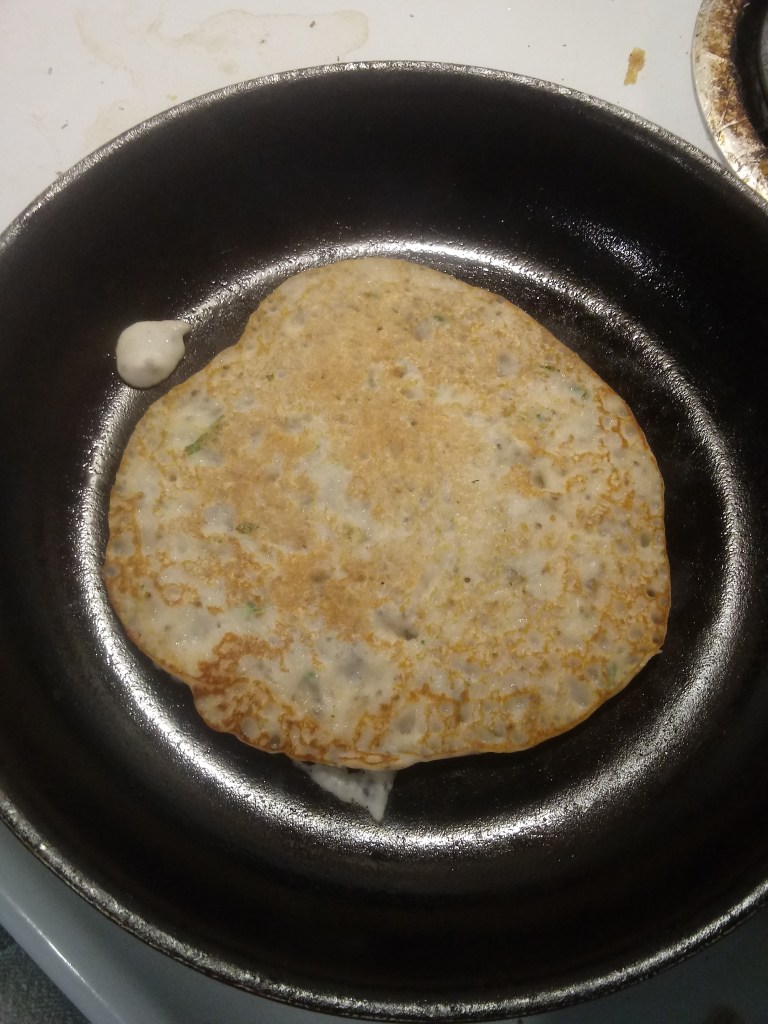
These are kind of like a thin pancake, so cook them as you would a pancake, but make them thin (so more like a crepe) so that they will better wrap around your fillings. These are great warm, but you can also store them in a large ziploc baggie for a day or two and they will hold up well. As quick and easy as they are, I would recommend making them fresh rather than making a huge batch and trying to get them to be as delicious after storing long term as they were fresh.
This recipe makes about 5 or 6 wraps depending on how large and thin you make them. It can be directly doubled to increase the yield. I made a double batch and it perfectly fed our family of 5, with enough for everyone to eat their fill of chicken gyros.
Ingredients:
1 Tbsp Ground chia seeds
1 Tbsp Water
1 c. Gluten-Free flour blend
1 1/4 c Milk
1 Tbsp Olive oil
Pinch of Salt
Seasonings of your choice, to taste. Some options include: Fresh Parsley (chopped), Fresh Chives (chopped), onion powder, garlic powder, ground cumin, thyme, seasoning blends, etc.
Directions:
Combine ground chia seeds and water in a small bowl and set aside. Combine all other ingredients in a large mixing bowl. Add in chia seeds and whisk thoroughly until batter is smooth.
Batter almost ready to flip. Can you see the little bubbles?
Preheat a small skillet or electric griddle over medium heat. Spray with a small amount of cooking spray, then scoop 1/4 to 1/3 cup of batter onto the hot skillet, spreading it out to create a thin “circle.” Watch for bubbles to come to the surface of the batter. When they pop and do not fill back in, then you now that you are ready to flip the wrap.
Flip the wrap over and allow to cook for another minute or two. You will know that it is about ready when you can lightly shake the skillet and the wrap will slide, because the moisture that would cause it to hold in place has cooked off.
Beautifully golden, thin and flexible. These are perfection!
Looking Good! Almost done!!!
Remove from the skillet to a plate or platter. Stack the wraps as you go and they will keep each other warm and pliable. Repeat this process until you have cooked all the batter and have a nice stack of wraps.
Fill with whatever toppings you desire and enjoy!
Chicken Gyros in Gluten-Free, Leaven-Free Sandwich Wraps
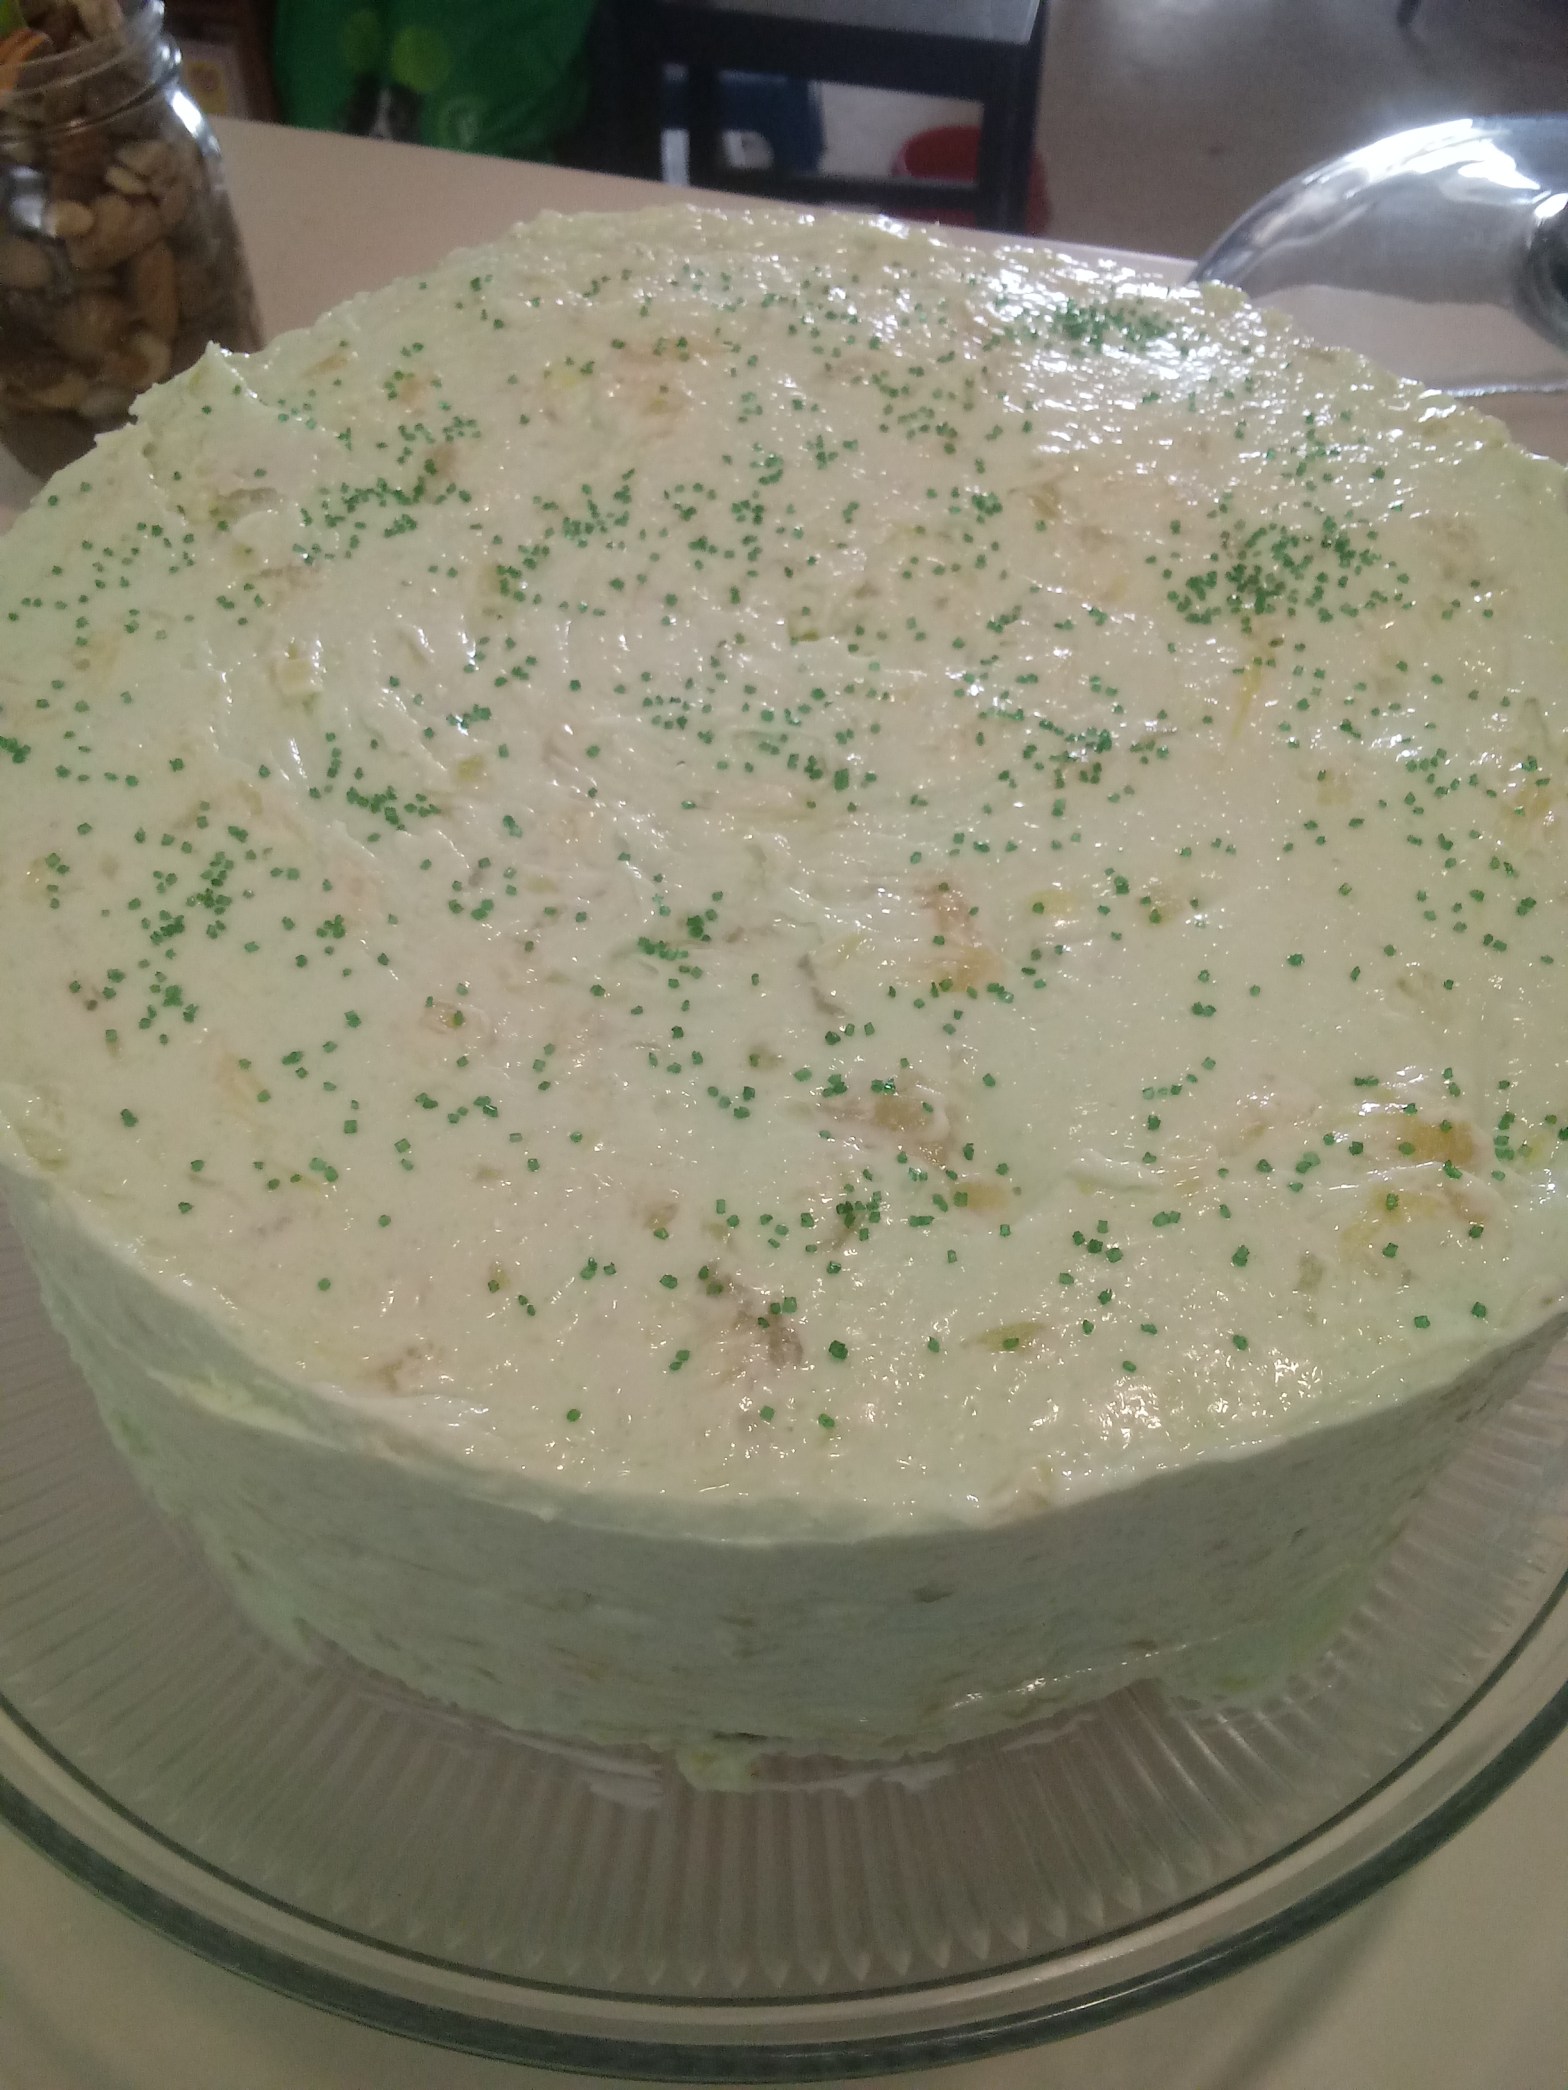
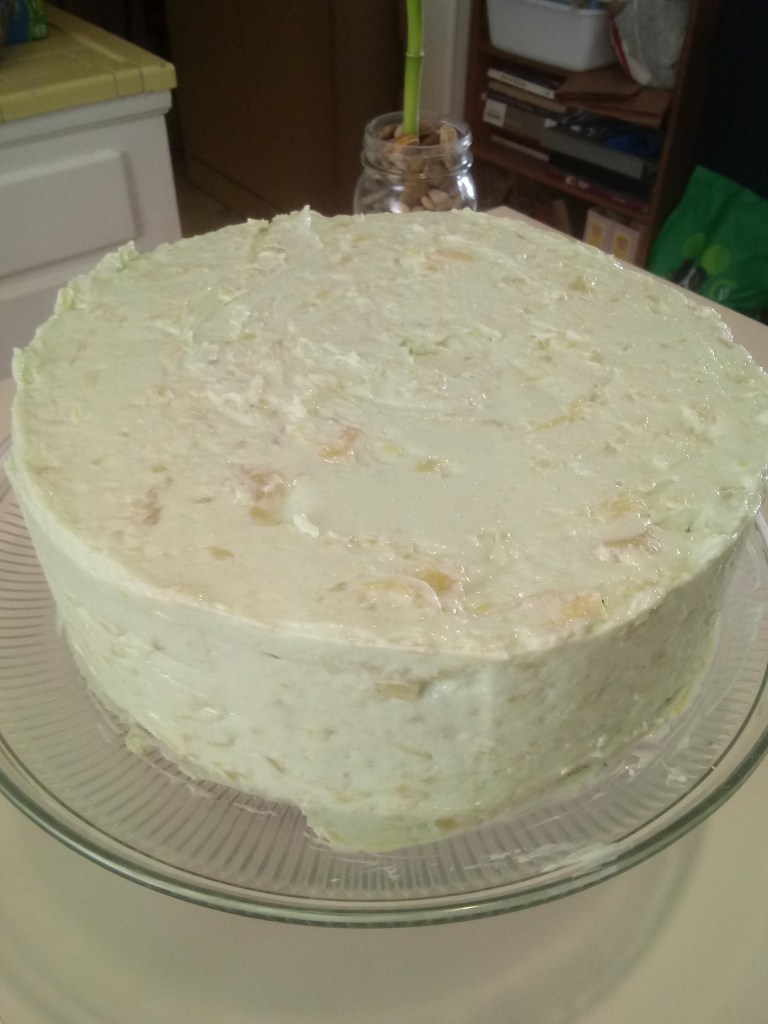
So this whole Covid-19 thing has totally and completely messed with my middle son’s birthday. From not being able to have the party he wanted to not being able to get ingredients that were needed, it has been a fiasco. I got fed up so today we celebrated the anniversary of his birth and had my mom and brother join us to make it a bit more fun. We had a huge taco feast with all of his favorite toppings and then some. And, for dessert, we enjoyed a key lime cake with lime pineapple frosting. It was super yummy and super simple!
Notes:
The cake I made was from a mix, I admit. Aldi has a Gluten-free key lime cake mix which I used. I made two boxes of it to get two layers, and added an extra egg because when I made it in the past, it was drier and more crumbly than was tolerable. The extra egg seemed to help quite a bit. If you have never been to an Aldi, they are a nice little store and have some really great quality gluten-free products. They also are a lot less expensive for many things and I almost exclusively buy dairy products there. It is worth it to check it out if you need to be gluten-free or you just want to save some money. (If you go, grab a macaroni and cheese pizza if they have it in stock. They are AWESOME!)
Now that my Aldi ramble is done, as I was saying, I used a cake mix. Do not be ashamed if you do the same. The quality and ease of a box mix is wonderful. Plus there are some great flavors available. This frosting would be great on a white cake, lemon cake, coconut or pineapple cake, or even a Florida Sunshine cake (though I much prefer my lemonade frosting on that, just saying). Whatever you desire.
Plus this frosting is easily adaptable to whatever flavor combination or color combination you desire. All you have to do is change the flavor of the Jell-O, and swap the pineapple for another fruit (as well drained as possible) or leave out the fruit altogether. It is a very flexible and forgiving recipe so have fun and enjoy it!
The most important point is to THOROUGHLY drain the fruit. Excess moisture will make the frosting more runny. I used a sieve to press out the extra juice, but you could also put the fruit in cheesecloth and press it out well. If your frosting is runny, you can add more powdered sugar to help thicken it.
When I made this cake, I just sprinkled a little green decorating sugar over the top for flair, but there are so many options for decorating it. You could use some white or lightly tinted whipped cream or frosting to add details. You could sprinkle toasted coconut on top (especially nice if the cake is a coconut cake). You could add little decorator candies in pastel shades. Maraschino cherries, well drained, would provide a bright pop of color. Or you could use some slivers of candied citrus peels to make things interesting.
Ingredients:
2 pkgs (8 oz each) Cream Cheese, softened
3 Tbsp milk
4 Tbsp lime Jell-O mix
1 c. confectioner’s (powdered) sugar
20 oz crushed pineapple, well drained
Directions:
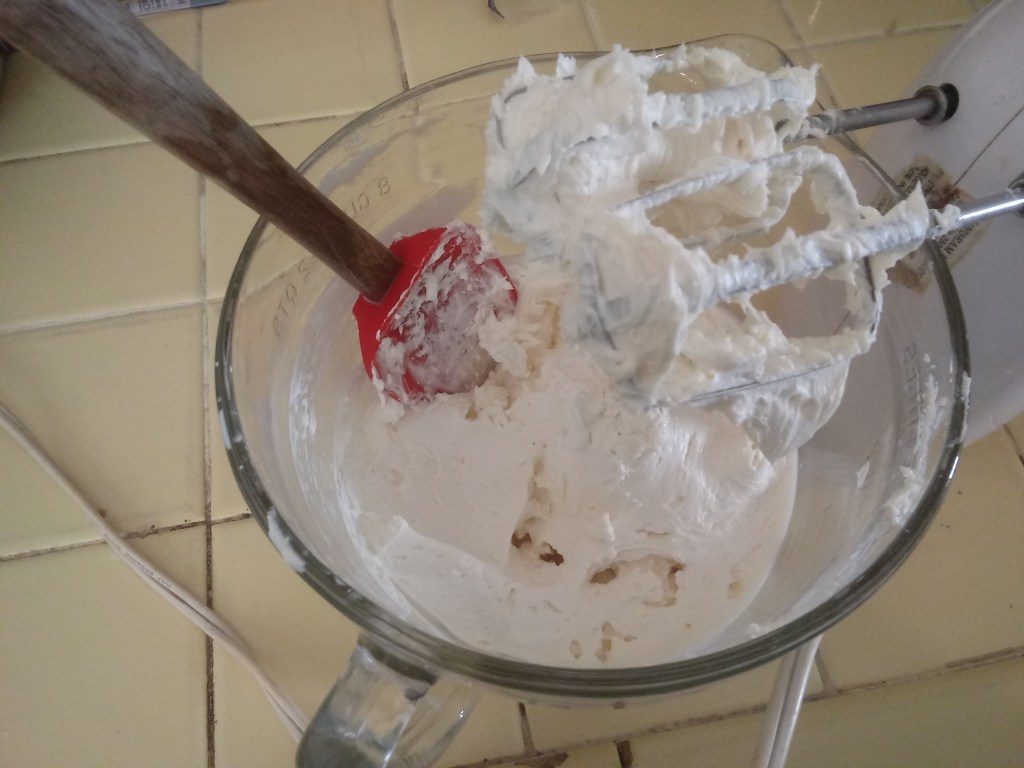
In a medium or large mixing bowl, whip the cream cheese until slightly fluffy. Add in the milk and beat until smooth and fully incorporated.
Add half the Jell-O mix and fully blend in, then repeat with the other half. Blend in the powdered sugar well. Mix in the pineapple until it is evenly incorporated into the frosting.
Enjoy. 🙂
(If you have any extra, try some on Ritz crackers. Trust me!)
Note: This recipe is being added without photos for the time being. I will add in pictures the very next time that I make this recipe. I am sorry for the unfinished state of this post.
Many years ago my grandmother asked me to make this cake for her birthday. The original recipe that she had called for fresh Calamondin oranges, which grew plentifully in my mom’s yard, so we were set. However, after 2 hurricanes have passed through and flooded her yard with salt water, most of her plant life is dead or no longer producing fruit, so I had to find a replacement recipe. This one is just as good as the old one and uses ingredients that most people can easily find in their supermarket.
For grandma’s birthday I paired the cake with my lemonade cream cheese frosting and everyone loved it. (As soon as I write up that “secret” recipe I will link to it for y’all. 🙂 )
Ingredients
1 pkg yellow cake mix (or orange)
4 eggs
2 – 3.5 ox packages instant vanilla pudding
1/2 c vegetable oil
2 tsp orange extract (omit if using orange cake mix)
1 – 11 oz can mandarin orange segments
Directions
Preheat oven to 350 degrees F. Grease and flour 3 – 9 inch cake pans (If you only have 2 then your cakes will need up to 10 minutes extra to bake through, but it can be done.)
Drain the oranges. Dice them into small pieces.
Combine the cake mix, eggs, pudding mix, vegetable oil, and extract in a large bowl. Beat for about 3 minutes. Stir in the orange bits.
Split the batter into the prepared cake pans. Bake them for 20-25 minutes. The cakes are ready once a toothpick inserted into the center comes out clean. Turn them onto wire racks to cool thoroughly before decorating.
Note: This recipe is being added without photos for the time being. I will add in pictures the very next time that I make this recipe. I am sorry for the unfinished state of this post.
When my youngest was born 11 years ago, my mom came and spent a month with us to help me adapt to having 3 little ones. It was a fun time and there are a lot of fond memories from that time period. One of the family favorites that came from that period was “Breakfast Cookies.” Basically, my mom was feeling feisty and logicked out that the ingredients in the cookies are just a baked form of what we have for breakfast anyways, so why not eat cookies for breakfast? Made sense to me and the two older siblings enjoyed the rare treat of cookies for breakfast.
Some days I do not want cookies that are super sweet, so I will cut back on the sugar a bit, especially since the raisins / dried cranberries add a natural sweetness that really shines through. I also love the addition of flax seeds which give added nutrition and an extra flavor to these cookies.
And, an extra note about butter vs margarine vs shortening. You can use any of them in these cookies. Butter (ALWAYS USE UNSALTED BUTTER WHEN BAKING PLEASE!!!!) will give slightly thinner and crispier cookies with a hint of nuttiness in the flavor. Margarine will give softer and puffier cookies. Vegetable shortening gives very flat cookies, but there is something lacking in the flavor. You can also use half of one and half of the other to get a texture and flavor combination that you like. Just experiment and figure out what works best for you.
Ingredients:
2 c. flour (can be substituted with a gluten-free cup-for-cup blend)
1 tsp baking soda
1 tsp baking powder
1 tsp salt
2 Tbsp flax seeds (optional)
1 c unsalted butter (or margarine or vegetable shortening)
3/4 c sugar
3/4 c brown sugar
2 eggs
2 tsp vanilla
3 c oats
2 c raisins or dried cranberries (or a blend, could sub in other diced fruit as well)
Directions:
Preheat oven to 350 degrees F. Prepare your baking sheets by spraying them with cooking spray or lining them with parchment paper.
In a bowl combine the flour, baking soda, baking powder, salt, and flax seeds.
In a large bowl cream the butter, sugar, and brown sugar together. (This means beat them together until you have a light and fluffy mixture. If doing this by hand, let your butter soften first to save your arm) Add in the eggs and vanilla and mix well.
Add half of the flour mixture to the butter mixture and mix in. Repeat with the remainder of the flour mixture. Stir in the oats and dried fruits until evenly mixed in.
Scoop the dough onto the prepared cookies sheets in approximately 1 Tablespoon scoops, leaving space between them because they WILL spread. (On a normal cookie sheet you can expect to get about 12 cookies per batch.) Bake them for 11-13 minutes until they look golden brown. They will be ridiculously soft, so allow them to sit for 2 minutes on the cookie sheet and set up before you take them off the cookie sheet and move them to a wire rack to cool.
There is a reason that professional photographers can make a good living being “Food Photographers.” Humans are very visual creatures. If food looks good, we get hungry for it. This is why the burgers in ads almost never look like what you actually get when you order. I was thinking about how often I have been guilty of just tossing food onto the plates of my hungry family. Usually by the time I get to serving dinner, I am exhausted and just want to sit and stuff my face.
Turkey club omelette I made for my husband.
However, it would not take that much more to serve the meal nicely and make it look good. I do that for my husband when I cook him breakfasts and lunches. If I make an omelette, fried turkey-ham, potatoes, and/or toast, I try to present it in a way that is as visually appealing as possible. And I feel great pride in doing so.
Even when one of us tosses something together for ourselves, it seems to taste so much better if it looks pretty.
Our children are growing and I want dinners together to be special, something they will always treasure and remember and bring forward into their future lives. So my goal now is to slow down a tiny bit at dinner time and present meals in a more appealing way. Tonight it will be meatloaf and mashed potatoes. I cannot wait to show you how pretty it will be. 🙂
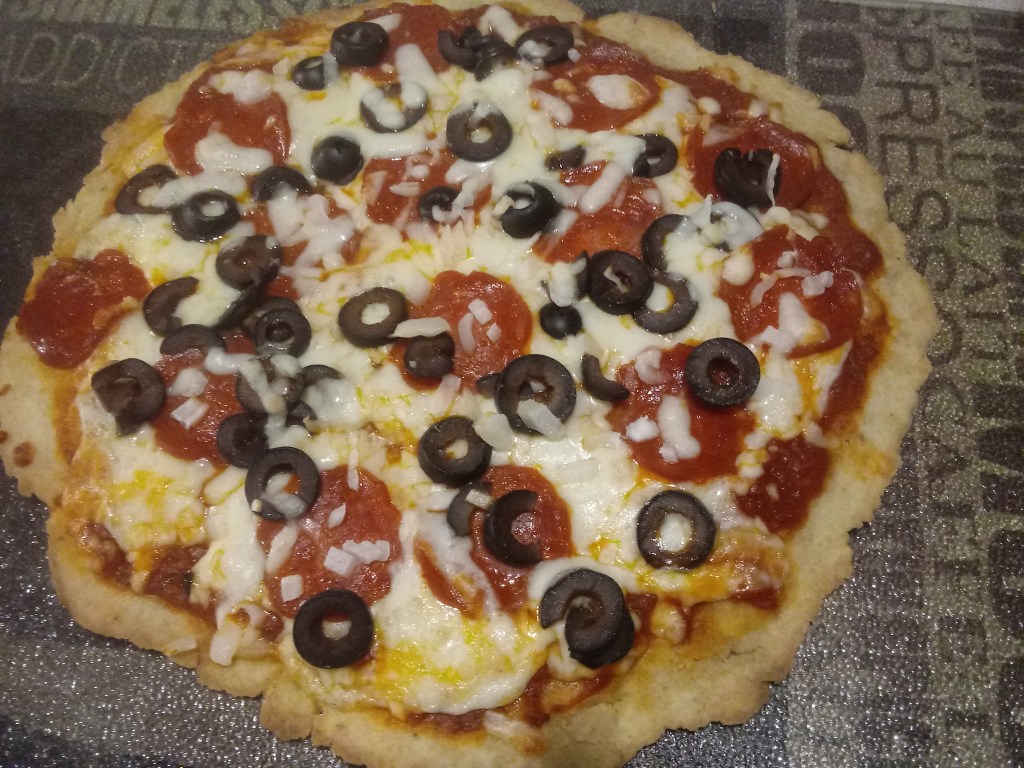
A gluten-free pizza that my husband whipped up for himself. Not perfectly round, but beautiful in its imperfections.
A rather easy meal that will be sure to please and result in many happy tummies.
I have been CRAVING the combination of cheese and broccoli for over a week now and it has reached mammoth proportions. I actually do have multiple types of cheese on hand as well as fresh broccoli, but life has left me kinda worn out. Chalk it up to the strain of tending to sick kiddos, or the bipolar weather patterns (80 degrees yesterday and a high of 50 tomorrow, what is up with that?), but my energy levels have been low. If it hasn’t been on the menu then I haven’t made it (with one exception being peanut butter krispie treats) … and cheesy broccoli has not been on the menu.
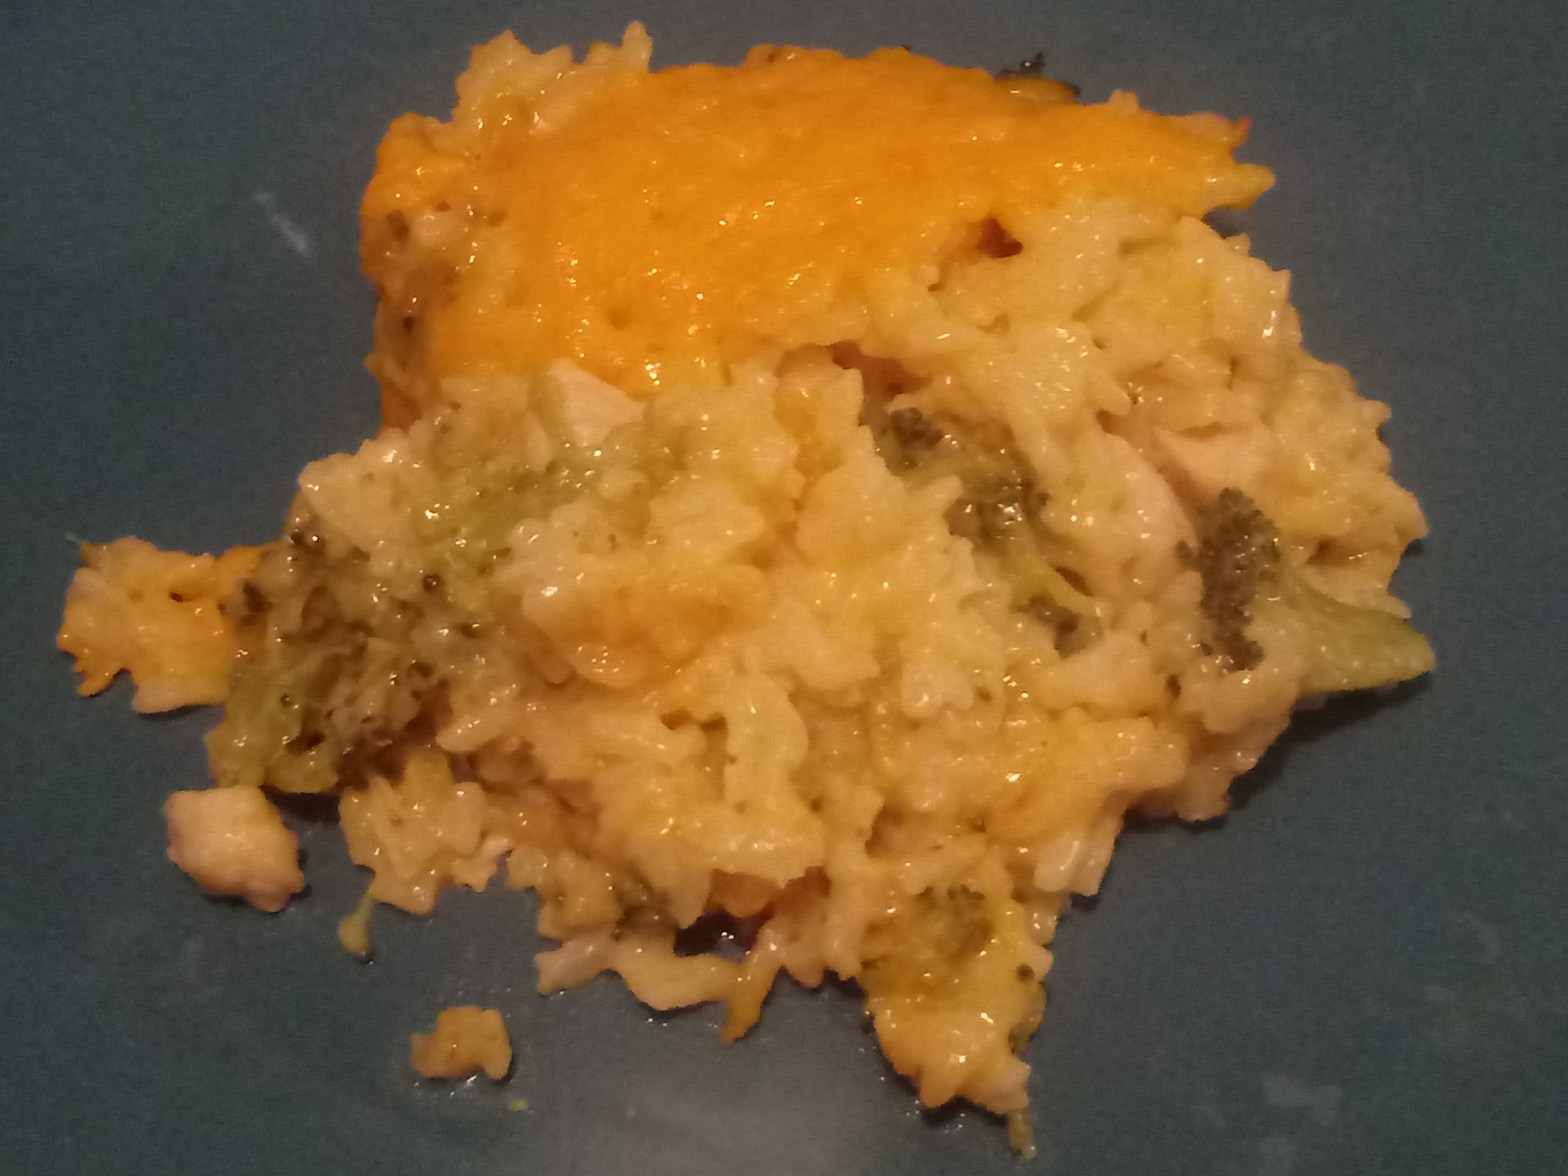
This dish satisfies any cheese craving.
Tonight I was trying to find a way to feed the family with what I have on hand and decided that I would include cheesy broccoli on the table. But I had nothing to go with it for a main course. We are going shopping for groceries tomorrow, and when I say nothing, I mean, NOTHING that would make for an acceptable main course for the whole family. No ground beef, no tuna, nada. Until I found a single humongous chicken breast in the back of my freezer behind a bag of blueberries. This chicken breast was gigantic and it inspired me to create what I am now sharing with you.
I have to say that I am feeling re-energized after this meal. I think that supplying my body with what it has been craving, and doing it in a way that brought smiles to every member of the family was a big boost for me. People were grabbing seconds and loving every bite. I will say that our family eats smaller portions generally, so the five of us only burned through half of the 13 x 9 inch casserole, but that means we can do leftovers on Saturday and there will be at least one thing for everyone to eat (if it lasts that long).
Notes:
This is my first time making this, but I do have some ideas for playing with the recipe in the future. For example, omit the rosemary and oregano (or Italian herb blend), and instead mix 1 tsp cumin into the cheese sauce as it is melting. Also add in about 1/4 to 1/2 cup of diced peppers, either bell peppers or something spicy if you prefer. At the end top it with Shredded Pepper-Jack cheese or a Mexican blend. That will give you something with a Mexican-style flair. I would likely also serve this version with tortillas because my kids love things that can be eaten like tacos and this would be perfect.
This dish will work well with either a frozen, fresh, or pre-cooked chicken breast. Obviously, frozen will take longer to cook than fresh, and pre-cooked will take a lot less time than either. It all depends on your preferences and what you have on hand. If you absolutely hate handling raw chicken (Rachel, I am thinking of you here) then using pre-baked chicken breasts will be a great option with minimal handling of the raw chicken. Stay tuned for a post about how I do baked chicken and what I do with it, probably next week after I get to the store. 🙂
I know that this could be made with canned tuna (2 – 3 standard cans drained well) in place of the chicken, but you could also use a pound of ground beef as well for a cheeseburger type of casserole. Consider this dish also as a post-Thanksgiving use of all the leftover turkey.
I love dried rosemary but I do not love getting stabbed by the hard pieces when I use it, so I am always careful to crush up the pieces in my hand before adding them into a recipe. On the plus side, it leaves my hands smelling really yummy.
Ingredients
1 1/2 cup dry long or medium grain rice
3 cups water
1 head of broccoli cut into florets or 2 cups of frozen broccoli florets
1 tsp vegetable oil
1/2 cup diced onion
1 tsp dried rosemary
1 large or 2 smaller chicken breasts, chopped (about 1 1/2 cups)
1 Tbsp butter
1 cup milk
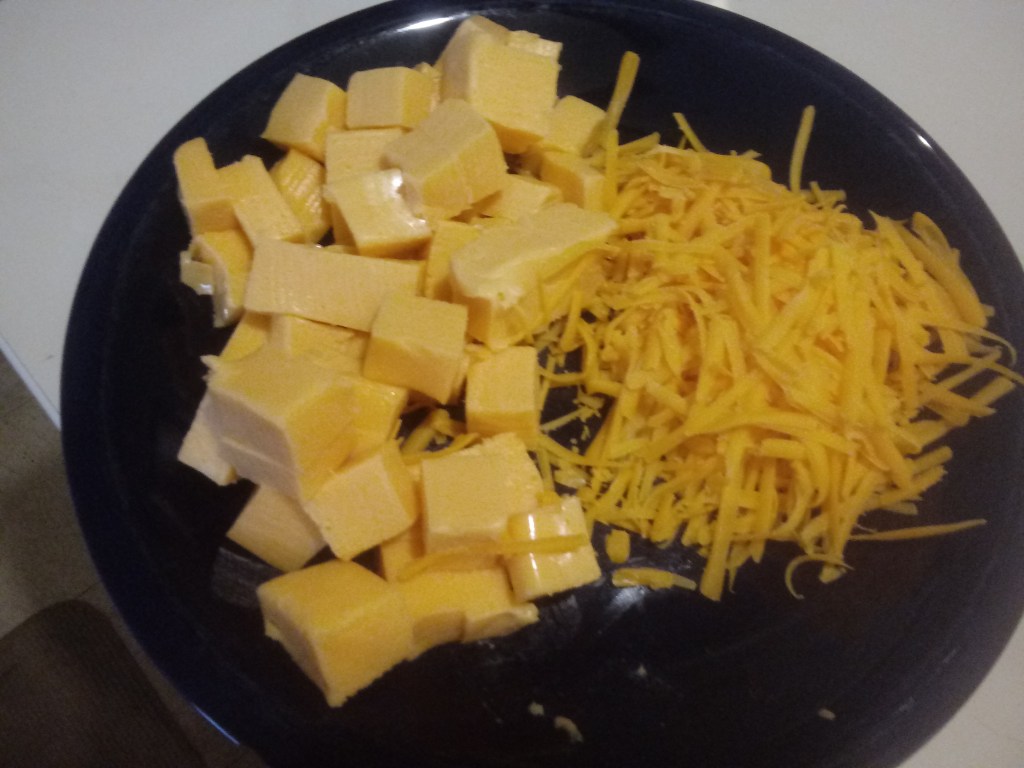
16 oz (about 1/2 a package) Velveeta or similar product, cubed
6 oz cheddar, shredded and divided (4 oz mixed in and 2 oz for topping)
1/2 tsp oregano or Italian herb blend
1/4 tsp garlic powder
Directions
Preheat the oven to 350 degrees F. Spray the bottom of a 13 x 9 inch baking dish with cooking spray and set it aside.
In a medium or large saucepan with a lid, bring the water to a boil. Once boiling stir in the dry rice and broccoli, cover, and reduce heat to low. Simmer covered WITHOUT UNCOVERING for 20 minutes, then move off the heat and leave covered until you are ready to use it.
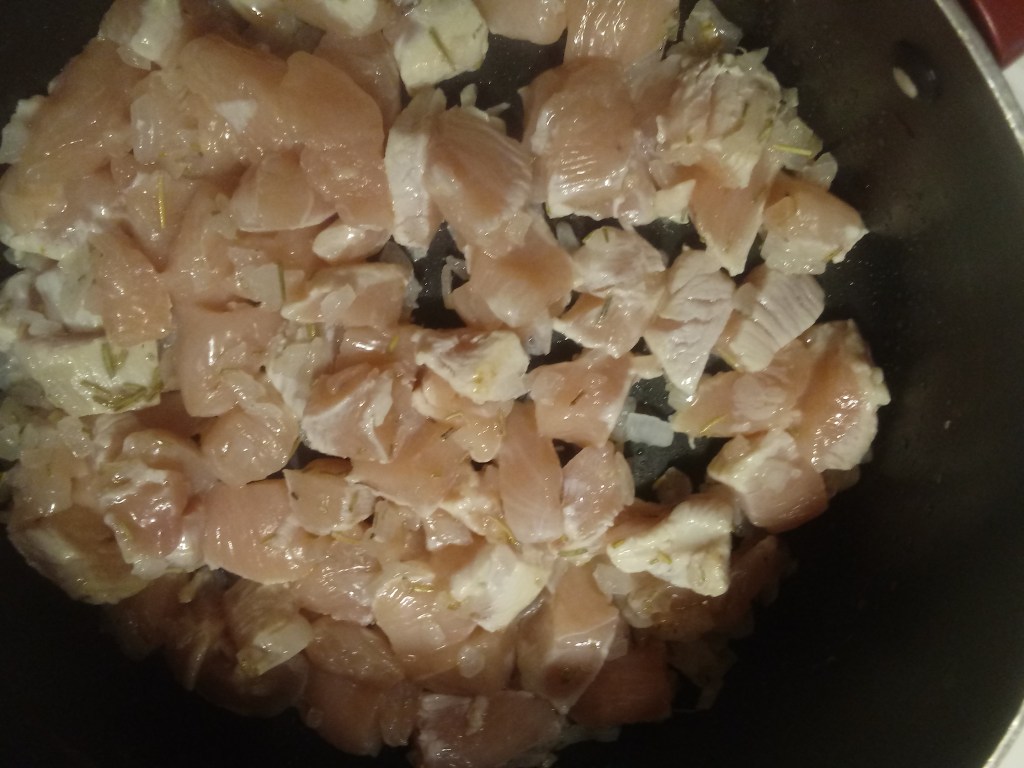
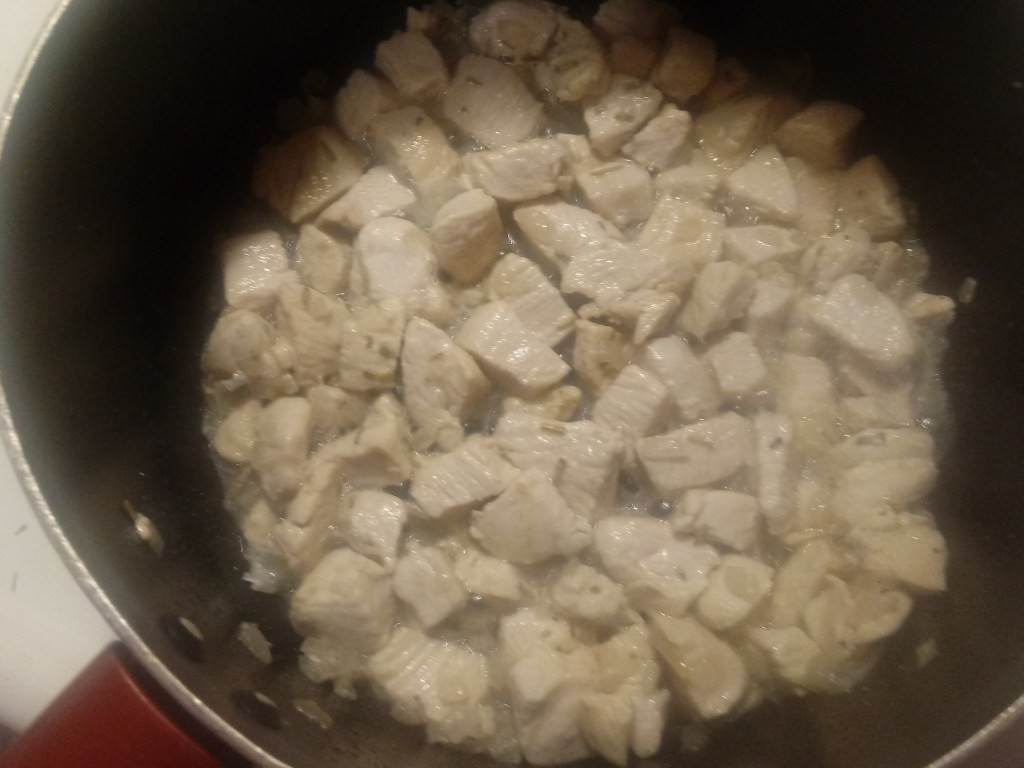
In a skillet or saucepan, over medium heat, pour in the oil and then stir in the onion and rosemary. Stir often until the onion is translucent (clear) and soft. Add in the chopped chicken and saute until the chicken is fully cooked, stirring frequently. Set aside.
Sauteing onion and rosemary
Chicken added and starting to cook.
Fully cooked chicken.
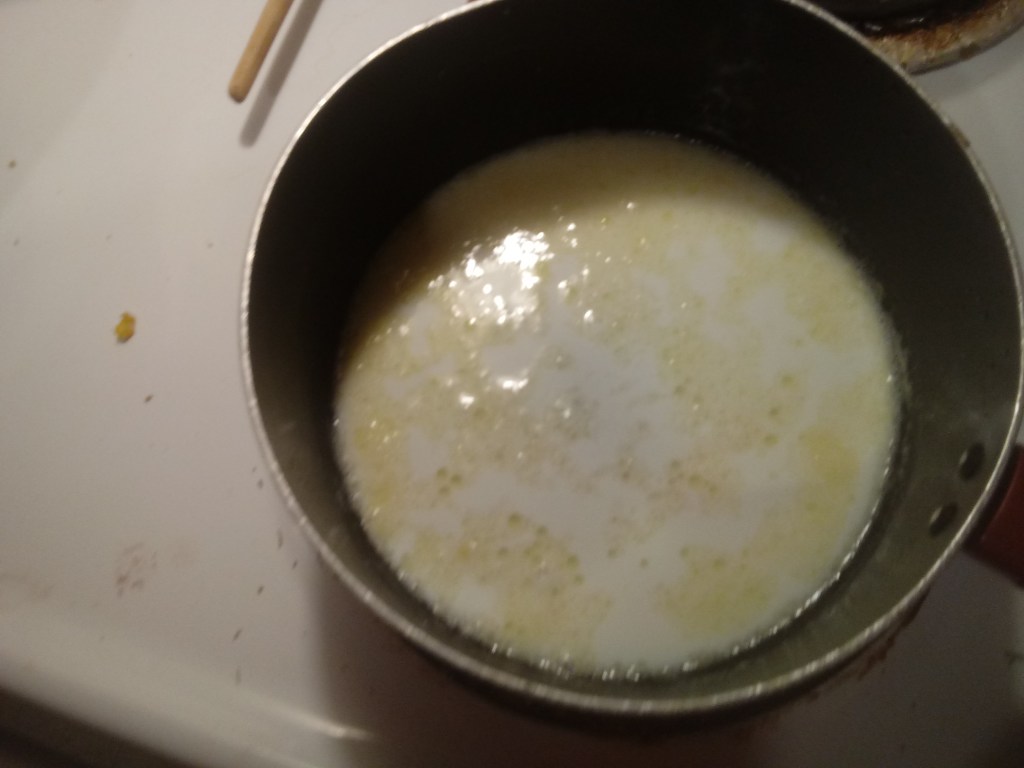
In a medium saucepan, over a medium heat, melt the butter. Once it is fully melted, stir in the milk and the cubed Velveeta. Stir almost continuously to prevent burning until the Velveeta is almost fully melted, then stir in the 4 oz of shredded cheddar, the oregano (or Italian herb blend), and the garlic powder. Continue stirring until everything is melted and smooth.
Butter + Milk all ready for cheese!
This herbed cheese sauce is great for many uses.
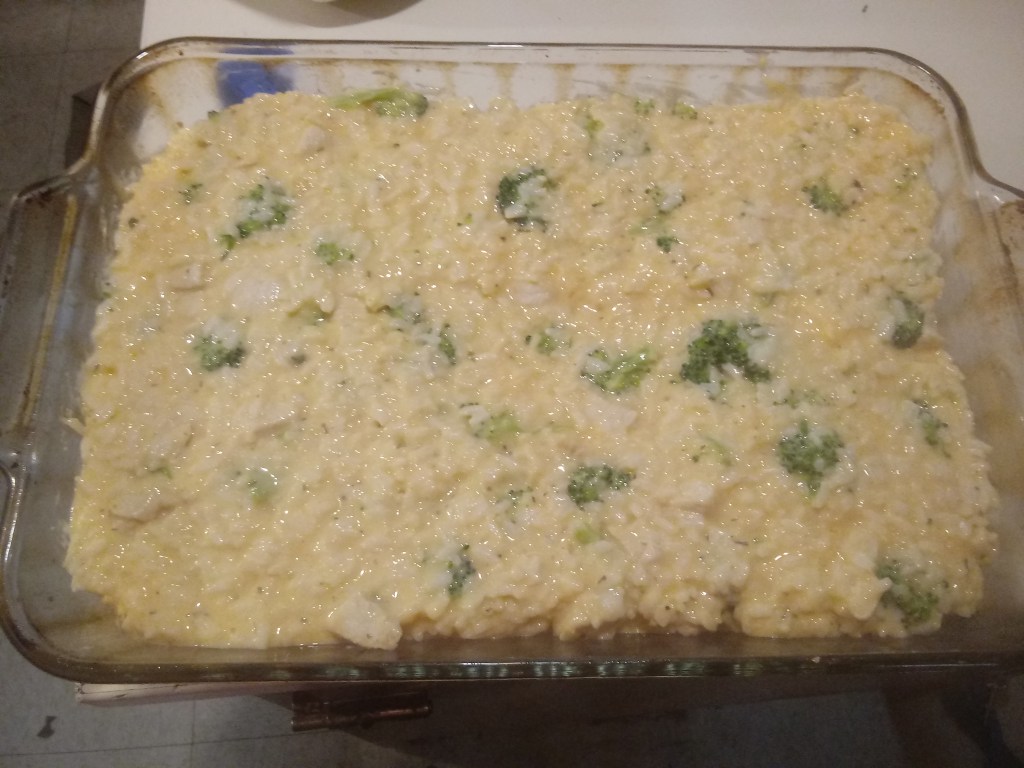
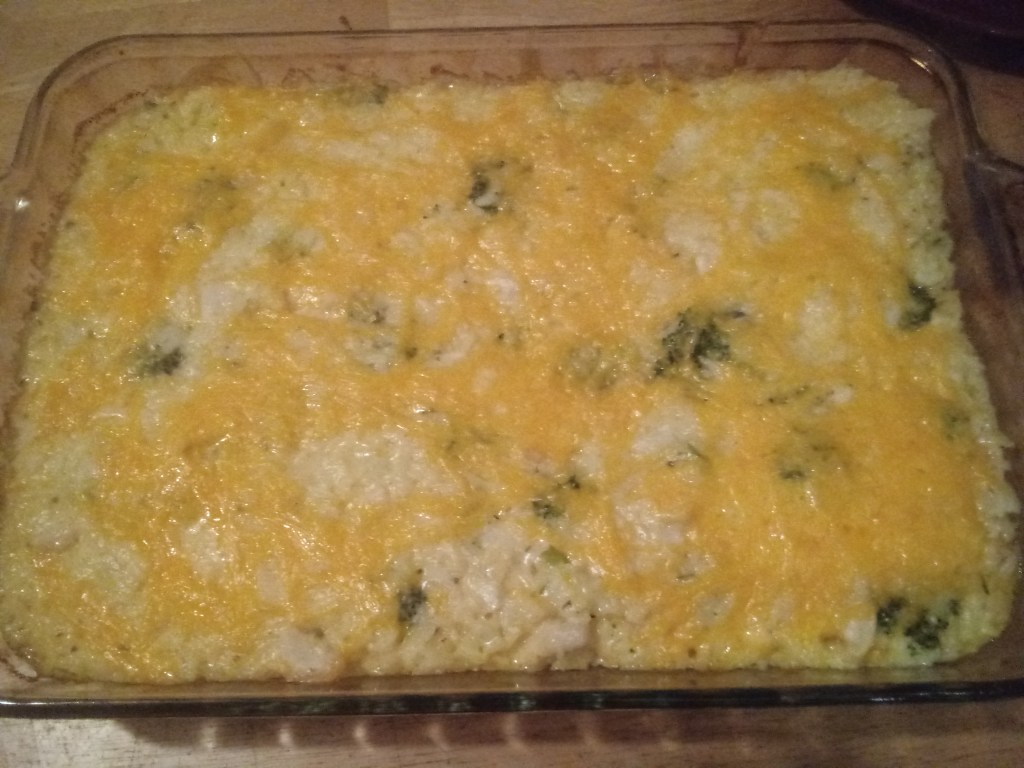
In a large mixing bowl, combine the rice/broccoli combination, the chicken, and the cheese sauce. Stir it well to make sure it is all evenly distributed. Dump this mixture into the prepared baking dish and smooth out the top. Cover and bake for 30 minutes. After the 30 minutes, remove the cover and sprinkle the top with the remaining 2 oz of shredded cheese. Bake uncovered for 10 minutes. Allow it to sit for a couple of minutes before serving.